


Starting a new software project can be a time-consuming and repetitive process. Developers often need to create a project structure and include various configuration files and dependencies to get the project running. These requirements are typically referred to as boilerplate code and can be reused across projects. While many frameworks offer CLI commands to simplify the process of starting a project, they may not cover every use case.
For instance, developers may need to reuse previously written code, such as linting configurations, database configurations, and related code snippets. Repeating these tasks for every project can be stressful and error-prone. One way to streamline the process is to create a CLI tool that generates project starters and code snippets based on specific needs.
In this article, we will explore how to build a project starter template CLI using Nodejs, readline-sync, colors, and fs-extra. By the end of this article, you should be able to create your own project template generator CLI tool with Nodejs, so let's get started.
Prerequisites
Before you begin, you should be familiar with:
NodeJS
JavaScript
NPM
Basic Linux command line
Let’s Get Started
Let's dive into building a Nodejs project starter template CLI. To get started, kindly follow these steps:
- Create a folder called
nodejs-project-cli.Then open the folder in the terminal and runnpm init -yto create a new Node.js project with default options.

Install the necessary dependencies by running
npm install colors readline-sync fs-extra –savein the terminal. This will install the plugins needed for our project.Open the project folder in your favorite text editor, and create a folder called "templates" in the root directory. This folder will hold all the projects you would like to generate with the CLI tool we are building.
Create a folder named
simple-express-appinside the "templates" folder.This folder will hold all the files required to setup a simple express app.Now go ahead and create a file named
index.jsadd the code snippet provided below. The first line of the script is called a shebang and informs the shell about the interpreter to be used when executing the code on the terminal.
The code snippet uses the readline-sync plugin to prompt the user for input and the fs-extra plugin to manipulate the file system. It then checks if the templates folder is empty before prompting the user to select a template. Once a template is selected, the script prompts the user for a project name, confirms the project name, and then copies the selected template to the new directory.
#!/usr/bin/env node
require('colors')
const readLineSync = require("readline-sync")
const path = require('path')
const fse = require('fs-extra')

const NO_CHOICE_MADE = -1
const CURR_DIR = process.cwd();
const templatesDir =  path.join(__dirname,'template')
const templates = fse.readdirSync(templatesDir)

if (!templates.length) {
   console.log('no template to choose from , templates folder is empty');
   process.exit(0)
}

const index = readLineSync.keyInSelect(templates)

if (index === NO_CHOICE_MADE) {
   process.exit(0);
}

const projectName = readLineSync.question('What is the name of your project? ', {
   limit: input => input.trim().length > 0,
   limitMessage: 'The project has to have a name, try again'
});

const confirmCreateDirectory = readLineSync.keyInYN(`You entered '${projectName}', create directory with this name?`);

if (confirmCreateDirectory) {
   const template = templates[index];
   const source = path.join(templatesDir, template);
   const destination = path.join(CURR_DIR, projectName);
   fse.copy(source, destination)
     .then(() => console.log(`Successfully created ${destination}`.green))
     .catch(err => console.error(err));
 } else {
   console.log('Aborted creating a new template');
 }
- Now that we have set up everything, it's time to add the required starter files into the "simple-express-app" folder inside the "templates" folder. You can add more folders based on the number of starter template files you want. Once this is done, let's run the app and see how it looks. Open the terminal and type in
node index.js.

The app runs well at this point, but we don't want to have to navigate to the project before we can run our CLI. We need to make sure our project is set up to run as a bash script and installed globally so that it can be run as a command anywhere in the terminal.
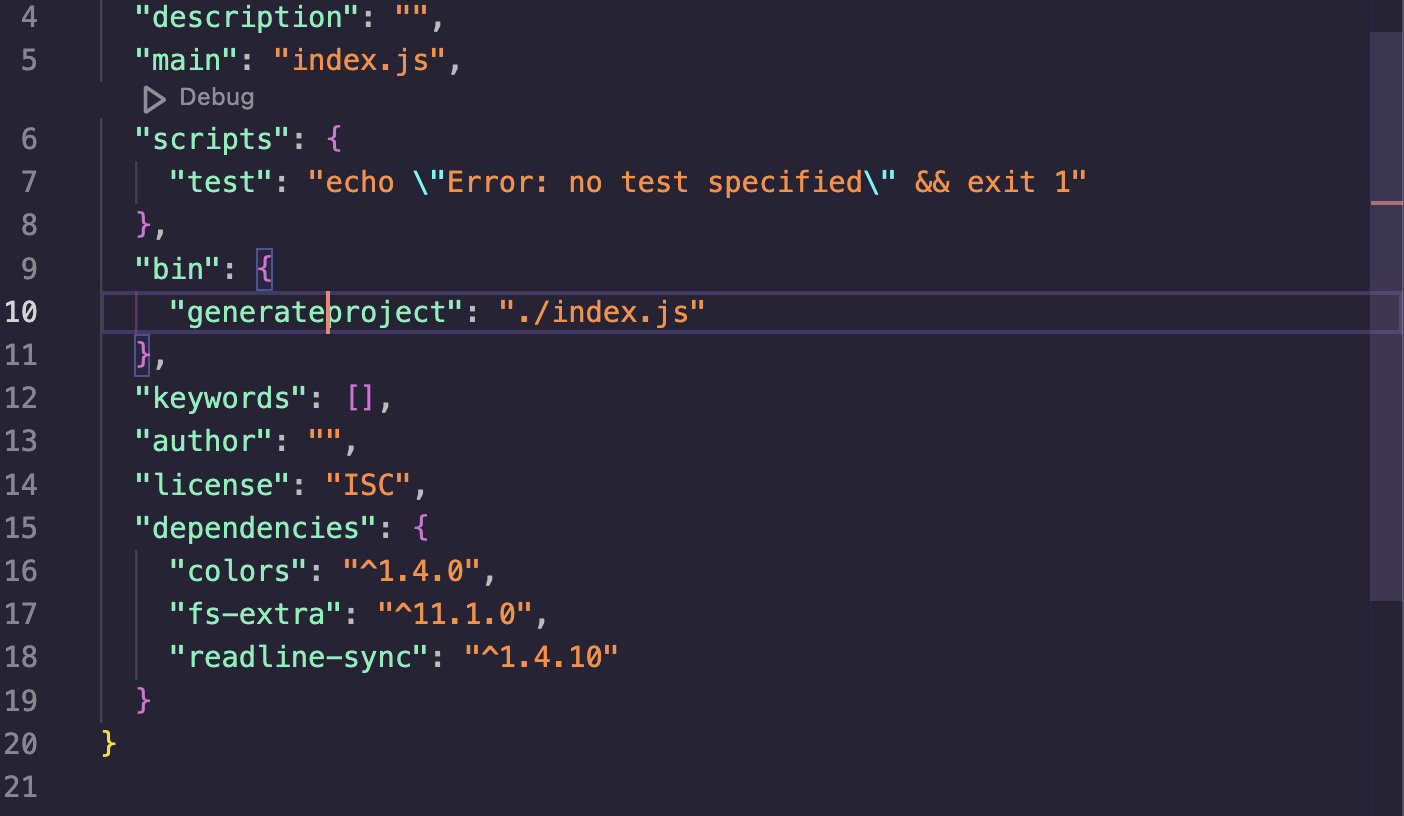
To do this, add the following snippet to the "package.json" file. The "bin" key helps to register "generateproject" as a command on the terminal as seen below:
"bin": {
  "generateproject": "./index.js"
},
- Finally, we need to install our CLI tool globally. Open the project folder in the terminal and run
sudo npm linkorsudo npm install. This installs the tool globally and makes it accessible through thegenerateprojectcommand.
Now, let's test out our CLI. Open your terminal anywhere on your machine and run the command generateproject.

You can add more template boilerplate code to the "templates" folder just like we did for "simple-express-app" and generate them on any new project you're working on. You can also uninstall the tool by running the command sudo npm unlink or sudo npm uninstall.
Conclusion
Yay, you made it! You have successfully created a powerful command-line interface that enables you to quickly create project starters with ease. While there are tools like this one with much more functionality, having your own tool is great. Nothing will satisfy your needs better than what’s written by you and for you.